From the Mouths of Babes

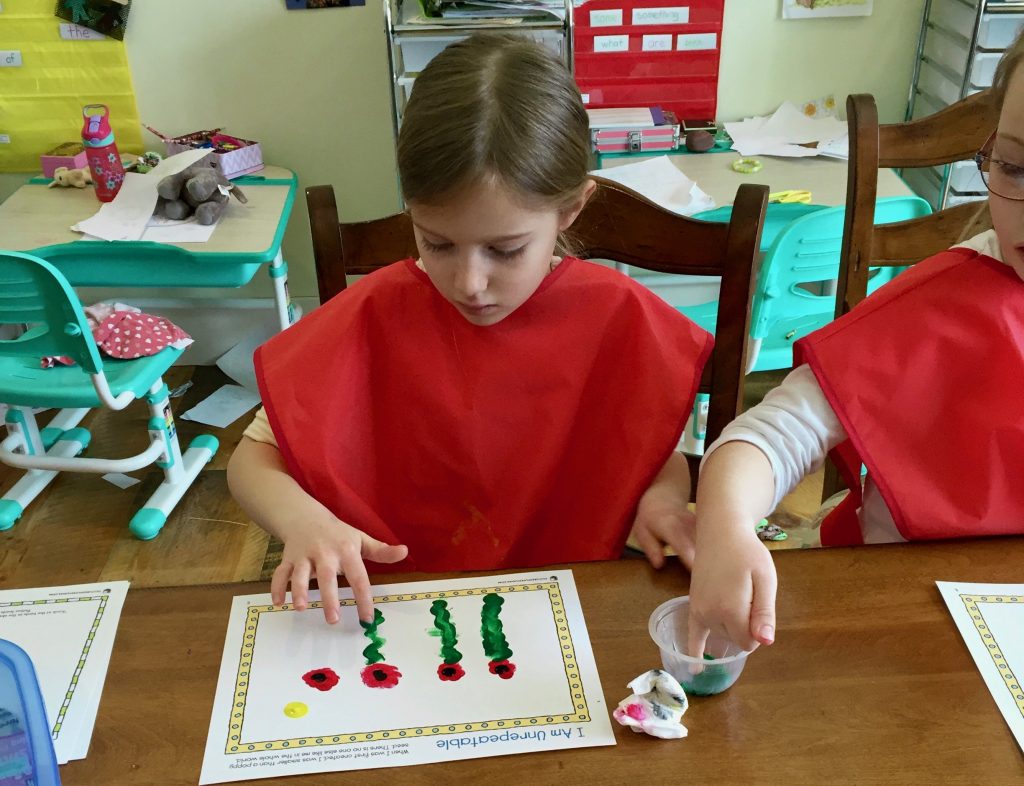
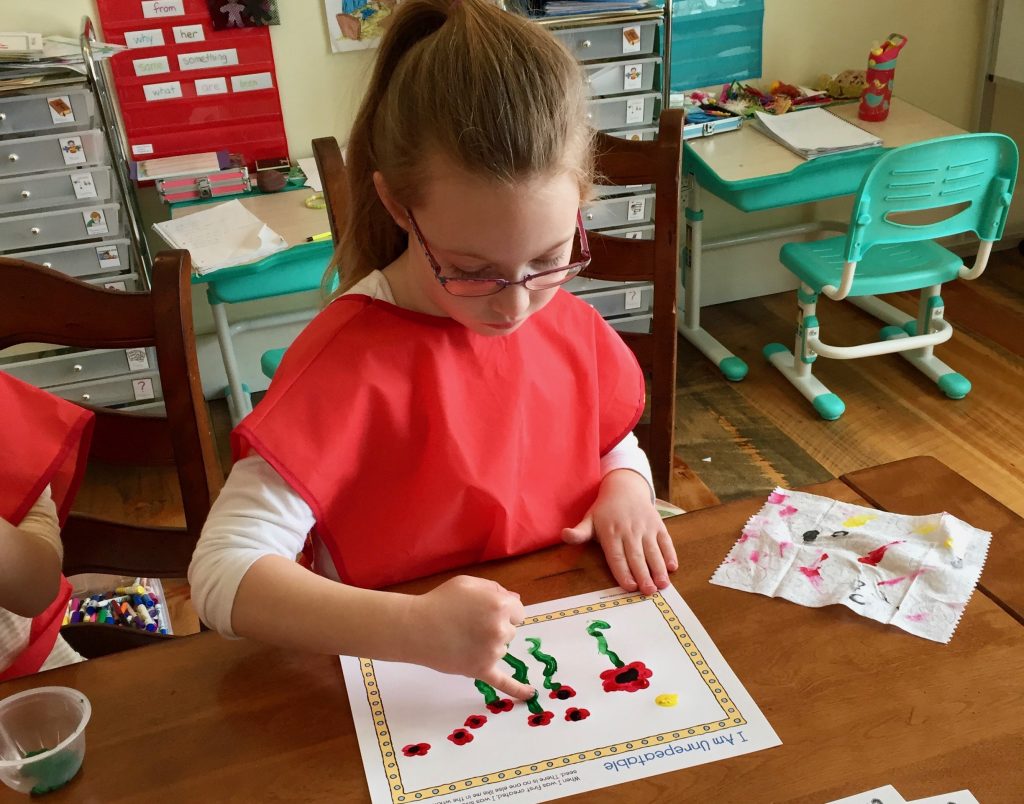
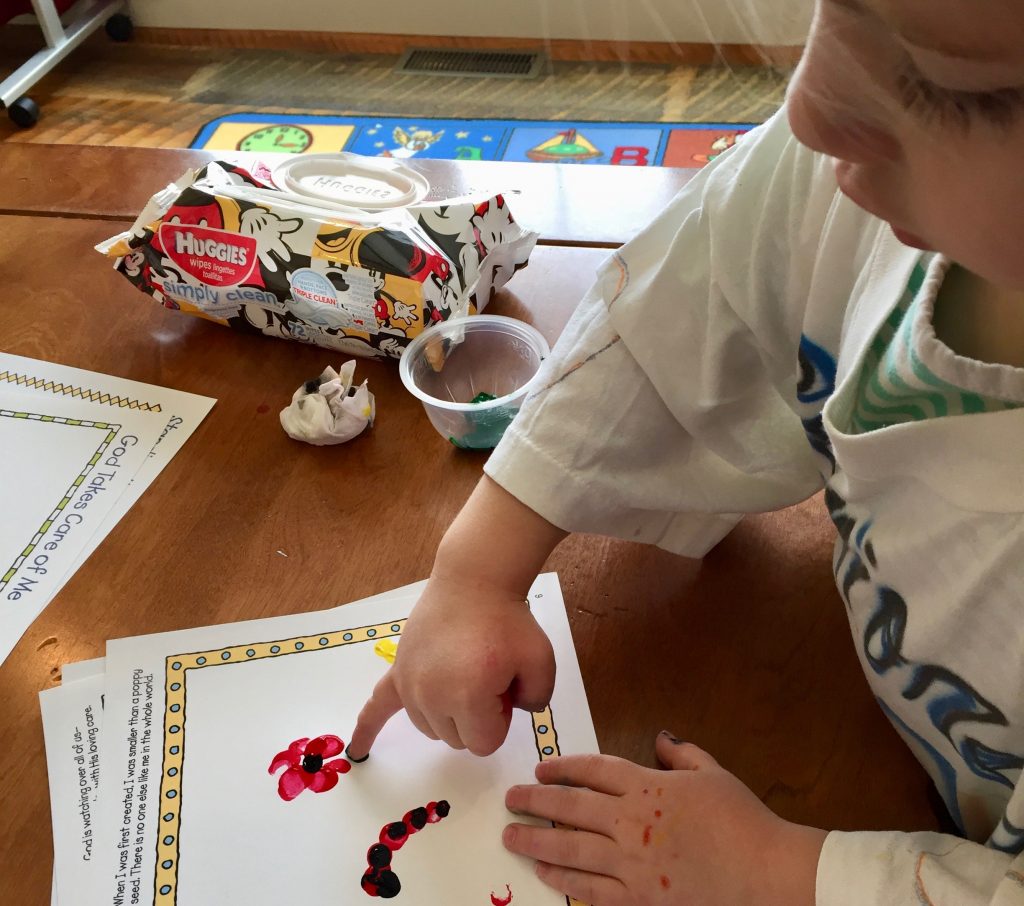
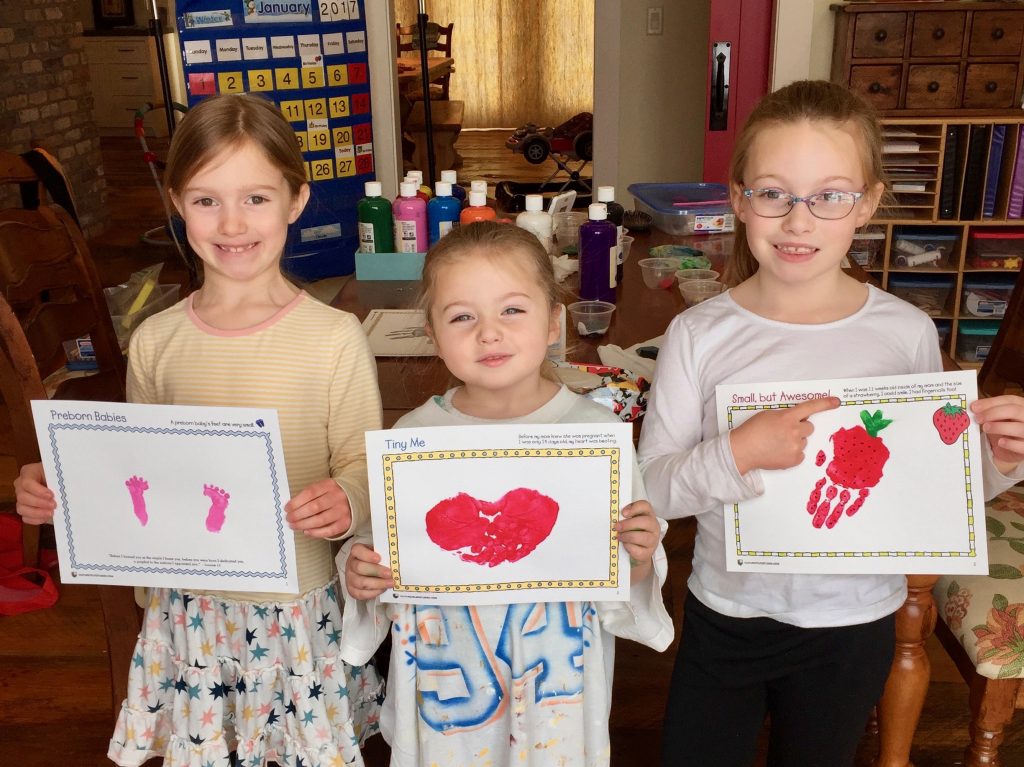
Yesterday, in honor of the March for Life, I started working with my girls on Pro Life Prints. We continued today. We talked about the sanctity of life, particularly the wonder and fragility of preborn babies and how we need to pray for their protection, all while doing artwork. Kids listen better when there’s paint involved, I think.

IMG_7427

I didn’t plan to talk to my girls about abortion. We have been praying for the March for Life and for an end to abortion during family prayers, but I don’t ever use the word “abortion,” and they are not familiar with the term or the concept. We simply pray for all unborn babies and their moms.

Yesterday, however, when we were talking about protecting unborn babies, Miss said that one of her friends had told her that “the lady who also wanted to be president” thinks that it’s okay to kill unborn babies. Then she asked, “Mom, how could that even happen?”

This was not a discussion I wanted to have. But that’s really the question isn’t it? How could that even happen?

IMG_7429

My stance on discussing grown-up issues with my kids is that I will answer all questions truthfully, but in an age-appropriate way and only as much as they ask for. So I started by explaining that some people do not understand that preborn babies are precious and should be protected. Then I said that there are doctors who sometimes cause babies to be born too early. So early that they aren’t able to live outside their moms’ tummies.

IMG_7426

The girls didn’t ask much more about it, but a little bit later I did talk to them about how important it is for us to keep doing the things we do, like praying for babies and moms and giving to the local crisis pregnancy center, because we have to help moms and dads as part of helping babies. They seemed to like that idea. They asked me if I had needed help from a crisis pregnancy center when I was pregnant with them, and I told them I hadn’t, because I have their dad, who is so wonderful, and their grandparents, and aunts and uncles and lots of friends. So many people supporting me. I told them that some moms don’t have that and so they get scared. (We have talked about this to some degree before because they have many friends who are adopted and so we’ve addressed why their birth parents might not have been able to care for them, and what a brave and loving choice it was for them to allow someone more able to be the parents of their babies.)

I think it’s important to include the support for parents, particularly moms, in the discussion of why and how we are pro-life.

IMG_7433

Through doing this project and hearing a lot about the marches of the past week, I found myself thinking about the way that unplanned pregnancy is typically talked about in this culture. It got me thinking about how I want to teach my little part of the next generation about life and parenthood and unplanned pregnancy.

I don’t want them to ever see a new life as a tragedy or an inescapable problem. I don’t ever want them (or anyone) to think that if they do experience an unplanned pregnancy, that they have no choice but abortion. I have found that this small art project we’ve worked on for the past two days is one small way of opening up some age-appropriate discussion and starting to shape their thoughts on the topic.

Naturally, my husband and I will have discussions with our kids about making good choices, being responsible, and why it is better to wait until they are married to have children (that’s a whole ‘nother ball game that I won’t go into here!), but it will never include,”Your life will be ruined if you get pregnant (or get someone pregnant) before you’re married.” We have family members who have faced unplanned pregnancies and have chosen life, with beautiful results. They will know those stories.

For now, we will keep working on our Pro-Life Prints. We will keep talking about the miracle of new life and how to help protect it. We will keep talking about the beauty of God’s creation.

IMG_7431

I will continue to pray that we will all keep asking the question, “How can this even happen?” and working to make it stop.

Cardboard Box Cars for Drive-In Movie Party: A How-To

As promised in this post about Miss’s Brave-themed movie party, I am sharing with you how to make the cardboard box “cars” we used for the “drive-in” element of the movie. There are probably lots of ways to do it. But, though I found lots of sites with cute pictures of kids in their cardboard box cars, I couldn’t find any sources that told how to actually make the cars. So I had to figure it out for myself. I’m sharing here so you don’t have to if you ever decide to use this awesome idea (which you definitely should do).

Making these was actually quite easy, but to save you a bit of brain power, just follow these steps!

1. Plan ahead enough that you can save up the boxes you’ll need. This was probably the hardest part. Fortunately, I decided I wanted to do this for Miss’s birthday before Christmas, so I was able to save plenty of boxes from gifts we ordered (I love you Amazon Prime). But I still didn’t quite have enough. I wasn’t worried about the boxes all being the same size, just big enough for a small person to fit. In fact, for the two littlest (Sis and our little friend who is just a few days younger), I used a diaper box. I did manage to get enough (and may or may not have placed some largish orders from Amazon Prime to make sure I’d get more big boxes – kidding!) though I had Super Friend holding a box or two for me just in case.

2. Anyway once you have enough, cut all of the flaps off each box except one per box on a short side. This will be your “dashboard.”

DSC_0582

3. Get some paper to wrap the boxes. I stressed over what to use for this. I had some pretty purple and pink paper left over from wrapping books during Advent, but I didn’t think our one boy guest would go for that, and I didn’t want to make a different color just for him (wasn’t sure if that would make him feel cool or weirdly different), so I went to Hobby Lobby thinking I would get some of the huge rolls of paper they have for teachers to cover bulletin boards, maybe in red or blue. Except that those rolls of paper are expensive. So. I just went for a roll of inexpensive butcher paper. I think the roll I got was about $6 and it covered all the boxes with plenty left over.

DSC_0583

4. For each box, flip your one flap in, but don’t push it down (keep it parallel to the bottom of the box). Turn the box over and wrap it like a gift.

DSC_0584

5. Then you need to cut the paper to make the opening for a kid to sit in. I did this by poking my scissors through in the center, a few inches from the back wall of the car-box. I cut straight forward toward the “dashboard,” stopping an inch or two short of it. I turned the scissors and cut in a “T” out toward the sides, and then, just before getting to each side, I angled back toward the front and cut up to the corner where the dashboard flap meets the side. Then I went back to where I stuck my scissors in and cut a “Y” shape to the back corners of the box.

DSC_0585 DSC_0586

I know that sounds as clear as mud, and maybe I should have taken a few more pictures, but if you’ve ever wrapped a present, you can do this easily even if you don’t cut it exactly as described.

6. After cutting, tape the paper to the inside, folding it under the dashboard flap so it’s smooth. Note: I did not put any extra tape on the box to hold the dashboard in place. The only thing that the kids were setting on it was a box of popcorn and cup of water. Wrapping it this way made it sturdy enough, but if you need it to be stronger, I’d secure it in place with some tape.

DSC_0587 DSC_0588

7. Because I didn’t shell out mucho dinero for the huge paper rolls, some of the boxes didn’t get completely covered on both ends. I just taped a piece of printer paper over the spots where the butcher paper didn’t cover.

DSC_0659

8. Add “car parts.” You could do this lots of ways. Cutting yellow circles for headlights and hot-glueing black paper plates for wheels was enough to give the general impression of a car. I had wanted to cut more paper plates and glue them on as steering wheels, put personalized license plates on the back, and use some shiny silver duct tape I bought (not regular duct tape, this stuff is fancy!) to make a grill or something on the front. But, I procrastinated, so I didn’t quite have time to do all the cute details I wanted to do.

DSC_0661


I still loved how they turned out.DSC_0582-2


The kids did too.


DSC_0599

A Brave Birthday

Brave Collage (1)


Miss had such a fun party yesterday. She asked for a Brave-themed party, and I ran with that, keeping it a bit more archery-focused than princess-focused. I have a little bit of a Pinterest obsession, and I found lots of cute ideas, though I ended up mostly just using my own.

The plan for the party started with the realization that, since it was on a weekday evening and we would be having it at my house, a movie party (and a small guest list) would be a great idea. With the movie being Disney’s “Brave,” of course. I remembered seeing little cars made into boxes for a “drive-in movie” party, so I went with that. It went over even better than I thought it would (I couldn’t find a tutorial for making the boxes, so I’ll share how I did it in a later post here. I know you can’t wait).

DSC_0582 DSC_0594 DSC_0599


I kind of wasn’t expecting the kids to actually sit in the boxes. They didn’t sit in them for the whole movie, of course, but for at least 30 minutes or so they did. After that it was chaos and the boxes were vroomed all over, filled up with toys, and crushed, but that’s okay.

For a movie party of course one has to serve popcorn, so I bought these cute little popcorn boxes and decoupaged the Clan DunBroch symbol on them.

DSC_0588


I didn’t realize until after I was done that I put it on upside down on all but one.

One of the decorating ideas I was most excited about was making “will-o’-the-wisps” for our front walk. In the movie, Merida follows these to her “destiny,” so I came up with the idea of making some for a cool decoration. I put a battery-operated tea light into some blue tissue paper along with a few marbles to keep them from blowing away and set them on white paper plates in the snow. They didn’t turn out quite as cool as I wanted, largely because it wasn’t dark out when guests arrived.

DSC_0578-2


But I still liked them, and they did look pretty when everyone left.

I found these fun “medieval” goblets for the table (and for the kids to each take home), so I got gold plates to go with them and blue forks and napkins to be “wisp-like” again. The goblets actually come half with pink and blue gems and half with green and blue, with was a happy surprise for me since we had our favorite boy guest in attendance.

DSC_0602


Of course I couldn’t possibly throw a party without some fun find from Etsy. I found a cute banner, which Miss loved.

DSC_0621-2


And I also got these bow and arrow charms to make necklaces.

DSC_0650I got them, along with some cotton thread and some beads from Hobby Lobby (and also these charms which I didn’t use this time), with the idea that I could let the kids make their own necklaces during the party. But then I decided that the movie, pizza, cake, presents, and archery (which Miss said she really wanted to do) would take up enough time. So I just made one necklace for each guest. I thought Miss could give them out as the guests came in, like we did with the horse tails at Lass’s party, but she didn’t want to wear hers and wasn’t really into handing them out, so I just put them in the favor bags.

Also in the favor bags were small bows with arrows for each guest (these came with little knives too, but I ditched those) and a Brave tattoo.

At the end of the shindig, the kids each took turns shooting Miss’s bow, which was the highlight of the evening for me (and seemingly for many of them). They all seemed to enjoy it, and Miss really wanted to include this as part of the party.

I am so please with how everything turned out.

DSC_0606 DSC_0605-2

^^When I asked her what she wanted for her birthday dinner she said, “pizza and green beans,” so each guest got some fresh green beans with their pizza!

DSC_0609 DSC_0614 DSC_0619-2 DSC_0629 DSC_0628


Everyone seemed to have fun.

The planning and crafting is a fun perk for me of having kids’ birthday parties. There were even a few things I didn’t have time to do (I got a cupcake stand but didn’t have time to decorate and put it together, and I got some paper targets and mod-podged them to some foam core boards but didn’t have time to cut them out and put them up). But obviously, the most important thing is that my girl and her guests had a good time. And they did.

Today I’m taking my five-year-old to her first piano lesson and to get a library card.

A Horse-Themed Birthday Party, With Sparkly Tail Tutorial

I always love the process of planning themed birthday parties for my kids. I enjoy looking around for fun and inexpensive ways to bring a theme into a party. I realize that makes me sound like a big dork. I’m sure my girls probably wouldn’t really care if their parties were themed or not, but I like having them pick one anyway.

And though Lass later decided she wanted an okapi-themed party, she had originally requested a horse theme. So that’s what she got. It was a cute theme, and I found lots of good stuff to make it fun.

(Note: if you don’t care to read about how I planned the horse party and made glittery tails for seven kids under 6, feel free to skip this post. It’s all I’ve got for you tonight:)

One of my favorite finds was this personalized “Pin the Tail On the Horse” game poster. It was huge, sturdy, and only $10! I just used double-sided tape for the kids to stick on the tails that came with the game, and I had a simple paperback book about horses for the winner’s “prize.”

DSC_0484

I also got a pack of these ride-on horses for the kids to color and put together. I considered putting out glitter glue and paints for these, along with yarn to make manes and tails, but in the end opted for easy and not too messy – markers and some googly eyes I helped the kids glue on.

The horses ended up being kind of chintzy and hardly any of the kids actually pretended to “ride” their horses once made, but it was a fun enough activity and I was glad I had a little craft for them to do.

I also had some horse tattoos for the kids to pick and put on during the party.

And those three activities were the only “structured” parts of the party, other than eating pizza and cake. The rest of the time the kids just played, mostly on our trampoline.

At the end I had Lass pass out these favor boxes. She and Miss helped me make them by decorating them with stamps and stickers.

DSC_0539

Inside each of the boxes were more horse tattoos, a booklet of horse stickers, some horse-shaped lollipops, a horse finger puppet (which looks a little creepy in person), and a couple of little plastic horses.

My favorite part of the horse theme though, was the sparkly horse tails I made for the kids to clip on their shorts (or in their hair, but they all wanted them on their shorts).

DSC_0543

(This horse balloon and the cups/plates I got here)

I originally saw the idea for this here (lots more ideas here). A mom made tails for kids kids to use in the “Pin the Tail” game (I had originally planned to use them for our game too, but sticking with my keep-it-easy plan, I made a last-minute decision to use the little cardboard ones that came with the game instead). She used rubber bands instead of clips, so the girls could put the tails in their hair after pinning them in the game. But she didn’t provide instructions for how she did it other than to say she used different types of yarn.

So. I came up with my own way of making tails. I didn’t want to use rubber bands because I knew we would have some boys at the party. And I thought just using yarn would leave them a little flat, so I wanted to add some other textures too.

Here’s what I came up with:

1. Materials used – Different colors of yarn, including some that was sparkly, silver, and fuzzy, 3/8-inch ribbon in different colors (I got ribbon scrap packs at Hobby Lobby because I didn’t want to buy a bunch of whole rolls of ribbon), 7/8-inch ribbon (I used some gros grain I had from a previous project), double-sided tape, 1-inch alligator clips, and tacky glue (I also tried Elmer’s, but the tacky worked better).

DSC_0523

2. Start by cutting about 7 to 8 inches of 7/8-inch wide ribbon. Lay it down flat and put a piece of double-sided tape down the length of it.

3. Cut pieces of yarn and 3/8-inch wide ribbon to the length you want your tails (ours were probably about 12 inches), and start randomly placing the top part of these pieces along the tape, very closely together.

DSC_0525

4. After you have about 6 inches of yarn and ribbon laid out, stop adding and leave about 1.5 to 2 inches of the wide ribbon for wrapping up at the end.

DSC_0530

5. Place another strip of double-sided tape over the top of the yarn and ribbon.

6. Start rolling at the end where you don’t have extra ribbon left (the left side in my pictures). Roll the tops of the ribbon pieces all up in the 7/8-inch ribbon and tape.

7. When you get close to the end of the tape and the yarn/ribbon, put your alligator clip on.

DSC_0532

8. Keep rolling right over the inner part of the clip. When you get to the point of having about an inch of the wide ribbon left to roll, put some tacky glue on it and then roll it the rest of the way. Of course make sure you open the clip and roll it underneath so you don’t glue your clip closed in the roll of ribbon.

DSC_0533 DSC_0535

And that’s it! They were so easy and I love how they turned out. Most of the kids seemed to get a kick out of them too.

DSC_0541

Miss is already asking for a turtle theme for her next birthday. I kind of want to get started on it, but I suppose I should wait to make sure she doesn’t change her mind, since her birthday isn’t until February 🙂

Snow White Birthday Party on the Cheap

You might remember, about a year and a half ago I wrote a post about my “Princess Issue.” I used to have a little bit of an anti-princess attitude. However, I’ve really lightened up on this, and over the past year, the princesses have really been a popular toy/play theme in our house. We even had lunch with the princesses at Disney for Miss’s birthday. My girls love playing with, reading about, and dressing up as all the Disney Princess gals. Snow White is typically the favorite, though recently they’ve really been into Ariel, and Cinderella and Rapunzel are always popular here too.

But I must admit, as much as I’ve lightened up on my anti-princess campaign and have come to enjoy, perhaps even embrace, the princesses these days, I still sometimes tend towards encouraging other toys, games, and books over the princess stuff. I guess I just want to make sure they’re getting variety.

So when it came time to start planning Miss’s birthday party, and I asked her what type of party she would like, I gave some non-princess examples.

Me: “You could have a cowgirl party, or an archery party (sounds odd, but this would be right up her alley, remember this?), or a fairy party…”

Her: “I want a princess party.”

Me: “Okay. Well. Any particular princess or just all the princesses in general?”

Her: “A particular princess.”

Me: “Which one?”

Her: “Snow White.”

Indecision is not a problem with this girl.

From that point, the challenge was on for me to come up with Snow-White-themed birthday decor that wasn’t cheesy, canned, or mass-produced by Disney. I knew I could give her a Snow White party, but I couldn’t make myself go to the princess aisle at the local Party Bomb store and buy up a bunch of their Disney Princess stuff. First of all, it’s ridiculous how much they charge for it. Secondly, they always sell it with several of the princesses together, and often Snow White is not even included. Third, well, I just didn’t want to. So I tried to get creative.

Where did I start? Why, Pinterest of course. From there I had to take the ideas and turn them into something I could do considering our particular situation.

I knew that we would be traveling for Miss’s birthday, and I wouldn’t be able to do a ton because we’d be having the party at my sister-in-law’s house. I wanted to do things that I thought Miss would enjoy that wouldn’t cost a lot of money. Also, I didn’t want to be too over the top with the princess-y stuff because the majority of the kid guests at the party would be Miss’s older and male cousins.

So I decided to go with the blue, yellow, and red color scheme (from her dress) and focus a little bit more on the Evil Queen and the poisoned apples. I really wanted to use some of the ideas from this post like the seven dwarfs ring toss, wishing well, and pass the poisoned apple game, but with the party being squeezed between sessions of the Iowa High School State Wrestling Tournament, I knew we wouldn’t have time for games. Plus most of the kids coming to the party were a bit old for these anyway. So I kept things more simple.

Anyway, focusing on poisoned apples and magic mirrors and keeping things cheap, I went to the dollar section at Target and the Dollar Tree store to see what I could find.

I found these packs of 10 (5 red and 5 green) apples at Target for $1. I didn’t immediately know what I would do with them, but knew I could use them for something.

DSC_0336

I never did come up with anything really clever, but I decided to make a few little signs. I wasn’t going to purchase a special font, so I just used the Blackmoor LET font in Word, on the largest size available, to make them. I thought they looked close enough.

DSC_0338

DSC_0351

At the Dollar Tree I found this silver-colored platter.

DSC_0339

I knew I wanted to make the Evil Queen’s mirror, and though it obviously wasn’t a mirror, it was the right size and shape and it was reflective. And oh yeah, it was $1.

DSC_0342

Referring to a picture I found online of the queen’s mirror, I used craft foam to frame it (package of foam crown shapes also from the Dollar Tree, I had to cut one down to size).

DSC_0344

DSC_0343

DSC_0345

I found some gold acrylic paint in my crafting stash in the basement,

DSC_0346

some glitter glue, a few big rhinestones (the most expensive part of the whole project because I had to buy a whole big package, but I’m sure they will get used around here), some Elmer’s glue to fasten it to the platter, and voila! A Magic Mirror.

DSC_0348

I took a Command Adhesive Strip with me so I could hang it on my sister-in-law’s banister.

DSC_0353

Miss and Lass got a kick out of it, and so did some of our littler guests.

DSC_0376

* Note – the glue didn’t hold very well after traveling with it. I had to re-glue it and add some tape to get it to stay. It still worked well enough though.

We had poisoned apple cupcakes.

DSC_0352

DSC_0411

I had seen a small stand-up doll Cinderella cake at our local grocery store bakery (like the kind my aunt used to make for my and my cousins’ birthdays!) and asked them if they could do Snow White. They said yes, so I ordered one. I didn’t want the whole party to seem more about the Evil Queen than Snow White, and I thought Miss would really like the doll cake. Unfortunately they called me three days before the party (one day before we left for Iowa!) and told me that they did not, in fact, have Snow White. After a bit of a scramble to try to find someone in Iowa who could do one at the last minute with no luck, I hurriedly photocopied a couple pictures from the girl’s Snow White book and laminated them to set on the table to add a little bit of actual Snow White to the scene. A little cheesy, but it worked in a pinch and it was free.

DSC_0351 DSC_0353 DSC_0402I did take one party idea from the blog post mentioned above, and that was to have some little bird whistles available as party favors. The ones used at the party in that post got reviews on Amazon that said they were very hard for kids to blow and actually make them whistle, so I got these instead (bonus: they were cheaper).

DSC_0354

They were mostly a hit with the Under-18-Months Crowd.

DSC_0381 DSC_0384 DSC_0388 DSC_0390 DSC_0393

So there you have it. Some homemade apple signs, laminated copies of book pages, a homemade Magic Mirror from a $1 platter, poisoned apple cupcakes, and some bird whistles. It wasn’t fancy, and not nearly as elaborate as most of the parties I saw in my Pinteresting. But it worked well considering we had to take the party on the road and were hosting it at someone else’s home. And it was CHEAP. All the decor (not counting food, cups, plate, etc.) was under $20.

Most importantly, Miss enjoyed it.


T is for Thankful

This week we started our home preschool.

I’ve decided to skip getting a formal preschool curriculum and just wing it for now. I’m picking a letter each week and using free stuff I am finding online, along with a few things I’m making up as I go along.

Instead of doing the letters in order, I’ve chosen to pick the letters based on what is going on in our house or in the world (i.e. Thanksgiving) and just squeeze as much from one little letter each week as I can.

So, we started out the week with T is for Turkey.

We colored turkeys. We talked about turkeys. We made turkeys, using this printable from The Craft Nest.

We did T is for Tree and made our own “Trees of Thanks.”

I found great free printables from Twisty Noodle. They have tons of printables for each letter, and so much more (holidays, months, food, colors, etc.). You can print not just the picture with the letter and word but also a picture that has an area at the bottom for practicing writing the letter and word. Lass got the pictures to color. Miss got the pages with the writing practice.

Of course I realize that just coloring pictures of things that start with T doesn’t constitute preschool, so we did plenty of other stuff. The girls practiced scissor skills. We read lots of T and Thanksgiving relevant books, like The Thankful Book and Thanks for Thanksgiving and The Giving Tree (one of my favorite books ever, it makes me so happy that my girls ask for this one over and over and over). We sang an alphabet song that I got from her school that is set to the “Jeopardy” tune. Because who doesn’t love having that little ditty stuck in her head? Of course we did our calendar stuff every day. We made tacos for dinner. We did a science experiment with apple cider vinegar, dish soap, and water in a glass. It’s supposed to be a way to catch fruit flies (they get stuck in the bubbles on top). It had nothing to do with the letter T, but we I can’t stand fruit flies (it didn’t work, by the way). We did some counting. And lots of playing.

They love to play Rapunzel in our Learning Tower (don’t worry, the scarf, “her magical hair,” is tucked in her pony tail and isn’t wrapped around her neck).

I made up my own little Letter of the Week game, using categories for which the girls had to think of T words. This was a lot of fun for Miss. She got several of these on her own and most of the rest with just a little hint from me. All week she has been randomly pointing out, “Mama, do you know what else starts with T?” and then telling me something like, “Tick tock!” or “Tickle!” Lass does it too, though she has yet to actually name a T word. She does make the right sound for T though!

My favorite Letter T related activity this week by far was our tea party, with real tea and cream and sugar and t-t-treats!

The girls got all dressed up for our party.


She really wanted to do the “pinkies out” hold on her little tea cup like her sister. She spilled half of her tea in her saucer, and I convinced her to use two hands.


This week I was happy to not have to wake the girls up on Tuesday and Wednesday, get them ready, and drive them 25 minutes to take Miss to school. I don’t think Miss missed it. When I initially explained to her that she wasn’t going to go to school anymore but would be doing some school at home with me and her sister, she was a little bit confused. I told her that I would be her teacher, and she got sort of upset, saying, “I don’t want you to be my teacher, I want you to be my Mommy!”

Now she understands. Mostly we just did what we always do, with a little extra. On Tuesday she even called me “Teacher” once. It was priceless.

Next week we’ll be baking, and I need to do some more math related activities.

I learned a lot this week. And I had a lot of fun. I think I’m gonna love this homeschooling thing.

Girls’ Rooms Made Over

As I have mentioned several times, I have been crafting stuff for the girls’ rooms for the past few weeks.  I think it has been my form of nesting.  I am finally near enough to completion that I can reveal what I’ve been working on.  Here’s a look at Lass’s room.

I’ve already posted about how to do the growth chart.  If you want to know how, see the tutorial here.

This is basically what Lass’s room looked like before (check out how tiny Miss is in this pic!).  All of my girls’ rooms had fairly pathetic wall decor, so I decided to use a few ideas from Pinterest, add a few ideas of my own, and make them much more fun and interesting.

I got the idea for the fabric rings from Pinterest.  They are so easy and cheap and really make a big impact I think.  I am not completely happy with the balance of the circles in Lass’s room, so tonight I made a couple more circles and will try adding them tomorrow to make it look better.  But I still love it even as it is right now.

I also spruced up the other side of her room.

This is what it looked like before.  I needed to take this huge rocker and move it to Baby Sis’s room, so I brought Miss’s old reading chair in and added some shelves.

I love the finished product.  My mom made these curtains!

Baby sis’s room still has a bit of work to be done, but the wall above her crib is done.

This used to be Miss’s room.  We were initially going to move Sis into our third bedroom, which was previously a guest room, but at the last minute decided to move Miss in there and put Sis in Miss’s room.  The main reason was because we couldn’t find a good place for the huge rocker pictured above in the other bedroom.

This was Miss’s crib that we converted to a full size bed when she moved into her “big girl bed.”  We converted it back and Miss got a new big girl bed you can check out below.  I made a couple of crib sheets for Sis’s crib and used the bed skirt that my mom and I (mostly my mom) made for Miss’s room before she was born.

The biggest transformation has been in Miss’s room.  We painted it this green originally to match the fabrics for Sis’s room, but the color works just as well with Miss’s new bedding.

In her old room, Miss had rails on the sides of her bed.  She was ready to have those taken off, as the only thing they have been needed to keep in her bed for the past several months have been all the “friends” Miss had been sleeping with.  I got these planter baskets from Hobby Lobby and they have been a perfect way to keep the friends within reach, though not right in the bed.

This was Miss’s reading corner in her old room.  The chair went into Lass’s room, Miss got a bigger chair, and the bookshelf stayed where it is for Baby Sis.  It’s attached to the wall, so Miss got a new book shelf.

Here’s Miss’s new reading/vanity corner.  I got her this cute little vanity to replace the dresser that was in her old room (which stayed in there to serve as a changing table for Baby Sis).

She has adjusted remarkably well to this move, considering we decided to do it kind of last minute.  She loves her new stuff, especially the vanity.  I also took some fabric flowers (left over from the arrangement I made for her that you can see below) and a few upcycled food cans (I made sure to remove all sharp spots) that I painted in coordinating colors, and I put them in one of the blue boxes on her shelf for her to use to make her own flower arrangements.  This has been a huge hit with her.

After all the shuffling around of rooms and furniture and all the crafting and sewing I’ve done (2 growth charts, tons of fabric circles, two crib sheets, and three large cardboard initials), I’m extremely happy with the results in all the girls’ rooms.  I have to give credit to my husband for all the work he did to help (moving lots of furniture, putting up a chandelier, putting together several pieces of furniture, and many other “Honey-Do” tasks). One of the projects I’ve been really happy with is the cardboard initials I did for each of the girls.  The initials came from Hobby Lobby.  I used Mod Podge to come up with three different looks for them.  They were all very easy.

For Miss’s I used torn pieces of scrap book paper and Mod Podge.  I just put the Mod Podge down before placing each piece of paper, used enough overlapping paper to cover the whole letter, and then put a final coat of Mod Podge over the top when it was all done.

For Lass’s letter I started by painting it green, and then cut out these flowers from the fabric that I had used to make her crib sheet.  The fabric flowers got Mod Podged in place, and then I again put a final coat of MP over the whole thing when it was done.

Baby Sis’s letter was done by just Mod Podging some of the leftover fabric from one of the crib sheets I made onto the cardboard.  This one was a little bit more tricky to figure out the best way to piece the fabric to get the whole letter covered and still looking nice.  I started by cutting strips of fabric as wide as the depth of the letter and covering the inner “V’s” of the N first.  Then I just used one big piece to cover the front of the letter and outer sides.  I had to wrap around a little bit, but it turned out great.

So, that’s what I’ve been doing for the past several weeks.  I still have a few more projects I would like to get done, but they don’t feel as pressing as these did.  Each of my girls has a pretty new look for her room, so I’m satisfied.

Lucky

I have neglected my blog terribly the past few days.  Sorry.  I think I’m nesting.  Unfortunately (though fortunate for me, I suppose) nesting during this pregnancy has not taken the form of feeling the overwhelming urge to clean my grout with a toothbrush or take everything out and wash the insides of my cabinets or anything crazy like that.  Okay, let’s be honest here.  I’ve never actually felt an overwhelming urge to do either of those things, even during prior pregnancies (though for the record, I have cleaned my grout with a toothbrush when necessary, but not out of a huge desire to do so).  But back to the point.  Right now for me, nesting = crafting.  I’m going slightly nuts crafting and sewing stuff for my girls’ rooms.  Pinterest is partly to blame, because I’ve gotten some really cute and easy and cheap ideas from things I’ve seen there.  But I’ve run a little wild and have sort of ended up redoing each of my girls’ rooms.  I’ve gotten a lot done, but my craft area (aka dining room table) is a mess of partially finished projects and equipment/supplies just waiting for the next project to start.  I can’t stop myself.

Happily I will have lots of photos to show when it’s all said and done.  If it ever gets all said and done…

The crafting craze has taken place when girls are sleeping.  When they’re awake, I’ve been trying especially to spend as much quality time with my two big girls as possible as we await the arrival of Baby Sis.

I tried to take Miss out on Saturday for a special “date,” just the two of us.  We got all dressed, coats and boots on, ready to head out the door, and she decided she didn’t want to go.  She wanted to stay home with her Daddy and Lass.  I had even mentioned “ice cream” to her in trying to get her to understand that we were going to spend some special fun time together.  Apparently Daddy and Sister rate above Mom and ice cream.  Ouch.  After his past week at home, she is really into Daddy right now.  When we got out the Play Doh the other day she was very excited to make a special piece for him.  We took this picture and emailed it to him.  Then she made him another item that we put in a ziploc so she could give it to him when he got home from work.  She was so proud.

I think the girls are missing him now that he’s back at work this week.  They still love their Daddy time at night though.

Somebody was hiding…

And now to the big news of the day…  I had my version this morning and it was successful!  I am still a little bit nervous that Sis could flip herself back to head up, but for now she is facing the right way and ready to come out any day now. Or in about 3 more weeks, if she’s anything like her sisters.  I have felt like she is getting wedged down into my pelvis, so hopefully that’s a good sign that she’s enjoying her new orientation and planning to remain head down.  I was fearful that I couldn’t be lucky enough to have two versions be successful, but I guess I am.  Of course, I’m lucky in so many wonderful ways, that’s just the tip of the ice berg.  Tonight, I’m remembering just how lucky I am.

DIY Growth Charts

I have been trying to get a lot of stuff done for the girls’ rooms before Baby comes.  This week was my target week to get things done.  For various reasons, I haven’t gotten as much done so far as I was hoping, but I did manage to finish growth charts for both Lass and new Baby Sis.  
Here is the one I made for Miss about a year and a half ago.  

I made this because I wanted a growth chart for her room, but I could never find one I liked or that would even remotely coordinate with her decor.  Frankly, I thought that most of the growth charts available for purchase were kind of gaudy.  At least those I looked at were.  I didn’t find any kind of tutorial for making my own growth chart, so I pretty much winged it when I did this one.  It turned out quite well, so I just used the same process with the two new ones.  Read on if you’d like to know how to do it.

Here’s what I used to make them:

Two yards of canvas duck fabric. For Miss’s I used white.  For Lass’s and Sis’s I got the natural unbleached color.  This type of fabric comes in various colors, so you can use whatever color you like.

Gesso and a gesso brush (or maybe a roller?) – For Miss’s, because I used the white canvas and wanted the background of the chart to be white, I obviously used white gesso.  You can also buy clear gesso, and that’s what I used for the two I just made to keep the natural color of the fabric (you would of course use clear on a colored canvas too).  I think you can also tint gesso if you wanted a custom color, but I didn’t try this.

Acrylic paint and paint markers to do the actual design, letters, and measuring “ruler” along the side.  Also a set of brushes.

12-inch wooden dowels – 1/2 inch in diameter (2 per chart).

Paint for the dowels – I used off white paint to match the canvas.

Ribbon for hanging the chart – I used 7/8-inch gros grain ribbon.

Two-inch stencils for doing the lettering of the girls’ names.

I got all of the above items at our local Hobby Lobby, so none of it is that hard to find.  For equipment, I used a sewing machine, staple gun, measuring tape, large cutting mat, straight edge, and rotary cutter.

Iron the canvas and then cover an area with gesso about 52-53 inches long and 13-14 inches wide.  The canvas below has two gessoed strips around the same size.

Paint your dowels.  Let the gesso dry overnight and then use your cutting mat, straight edge, and rotary cutter to trim it to 12 inches wide and about 51 inches long.  You might want to make it a bit longer if you think your child will be taller than about 5’10”.  That’s the maximum measurement on each of my girls’ charts, and the extra inches are to allow for folding over the edges to make pockets to slide the dowels in.

Speaking of which, fold the ends over about 1-1/2 inches at top and bottom and sew in place 1/4-inch from the end, leaving two pockets (one at the top, and one at the bottom).  Then slide the dowels into the pockets.  Cut 2 lengths of ribbon long enough to tie at the top and staple them to the back of the top dowel.  Make sure to staple them on an angle so they will be easy to bring together and tie.  Now your chart is assembled and ready to paint.

Use the measuring tape and a paint marker to mark the measurements along the side of the chart.  I started with 2 feet at the bottom and mark 1/4-inch intervals up to the top.  

Then I use the stencils to put the girls’ names at the top of their charts.  I just eyeball the placement of the letters, starting in the middle of each name to get them approximately centered.  Be careful to not use too much paint so it doesn’t bleed under the stencil and make sloppy letters.  I am no artist, but I added my version of “shading” by putting a bit of darker color in a few spots.

After that, the rest is just painting what you like.  As I said above, I am no artist, so I kept it simple with each chart and just did flowers in slightly different shapes and colors to match each girl’s room decor.  Here’s Lass’s:

And Sis’s.

None of them are perfect, but I’m okay with that.  Though I wouldn’t be satisfied with a sloppy end result, I’m okay with some slight imperfections.  That’s what I call “character” and it’s all part of making things yourself for your kids, in my opinion.  If you make a mistake, just gesso over it and try again.  Of if you’re using clear gesso, just find another way to paint over your error.  Lass’s chart has a bumble bee in one spot where I accidentally slipped with some blue paint.  Sis’s has a leaf strategically placed to cover a drip of dark pink.  When I made Miss’s chart, I gessoed some extra canvas so I could practice what I was going to paint.  Do whatever works for you.

My next project was supposed to be making crib sheets for Sis’s crib.  I found these beautiful fabrics when visiting my parents before Christmas.

The whole color scheme of Sis’s room is planned around these fabrics.  Unfortunately, when I went to lay out the fabric to cut it for the sheets, I realized that this fabric is 44″ wide, and the pattern requires at least 45″ wide.  I’m quite annoyed with myself for this mistake.  I did the same thing with the first fabrics I bought to make Miss’s crib sheets, so you’d think I would have checked the measurements before buying this time.  Oh well.  I’ll get it worked out.  I found a few coordinating fabrics at JoAnn’s to use for some other wall decor for the room, so I will head back there and to a local quilting store to see if I can find some fabric that will work with the color scheme and be wide enough.

I’ll use the original, inspiration fabrics for window treatments or something.  Lots to do still with only three weeks until my due date!