Kid-Made Stations of the Cross Box

Last year I made a Stations of the Cross box for my girls, inspired by the one Bonnie made and shared in this post.

The girls really enjoyed doing Stations last year using the box. It was fun for them to have something tangible to look at and touch while we read the book and prayers.

We had been doing it every Friday during this Lent too. They seemed to like doing the Stations and talking about them, just like last year. Last Saturday however, my kids’ love for doing the Stations went through the roof, and I had nothing to do with it.

Stations box

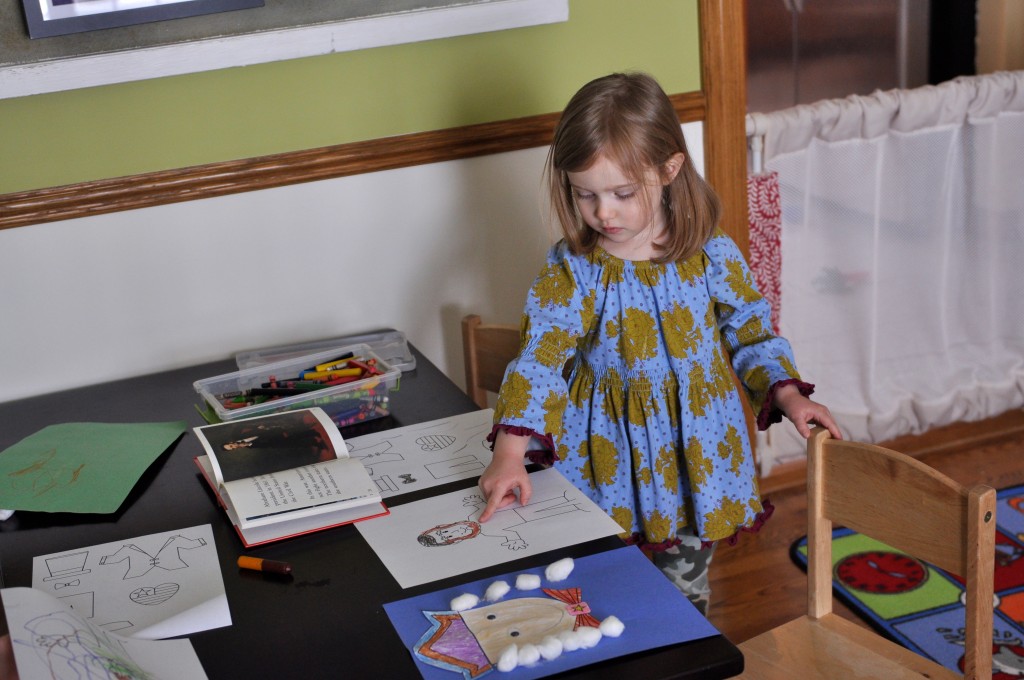
I wasn’t even home, but my oldest daughter decided she wanted to make her own Stations of the Cross box with the babysitter. All by herself, she came up with a way to make each of the items in the box or to substitute with something else if she couldn’t get or make what we had used before.

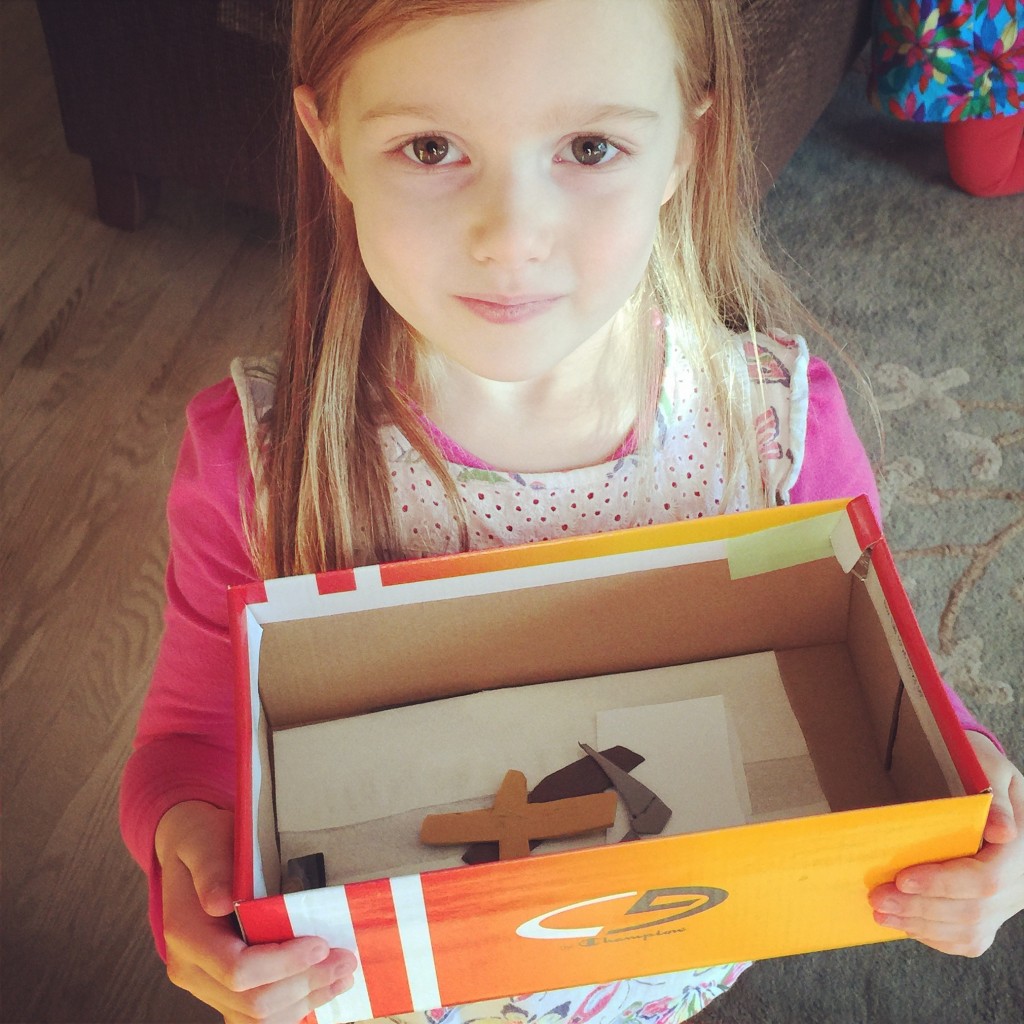
My babysitter texted me this picture while I was at the Catholic Women’s Conference on Saturday:

Snapchat--8401359772506790866

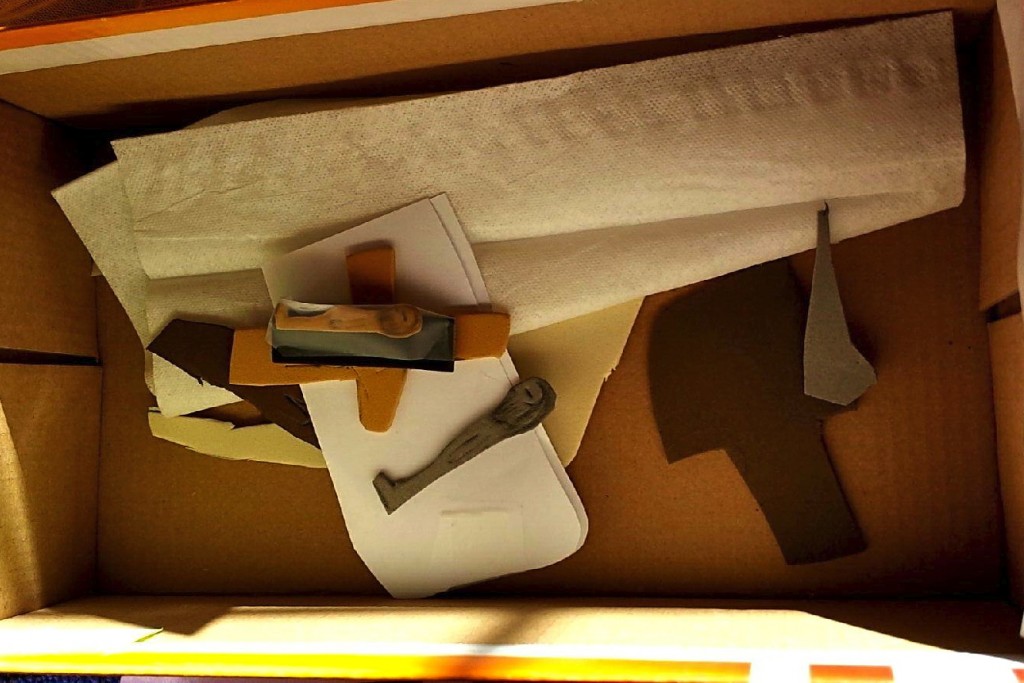
At first I had no idea what it was, but I thought for sure Lass had made it, because she has been into making small figures out of paper lately. I texted, “Is that Jesus?” The babysitter texted me back that yes, it was, and that Miss had made all the items and they had been sitting around doing the Stations.

Yes. My kids did the Stations of the Cross with my babysitter on Saturday, with no prompting from me. Twice. Then they requested to do it again when I got home. And we did it again before bed.

We’ve done it at bedtime every night since then, at their request.

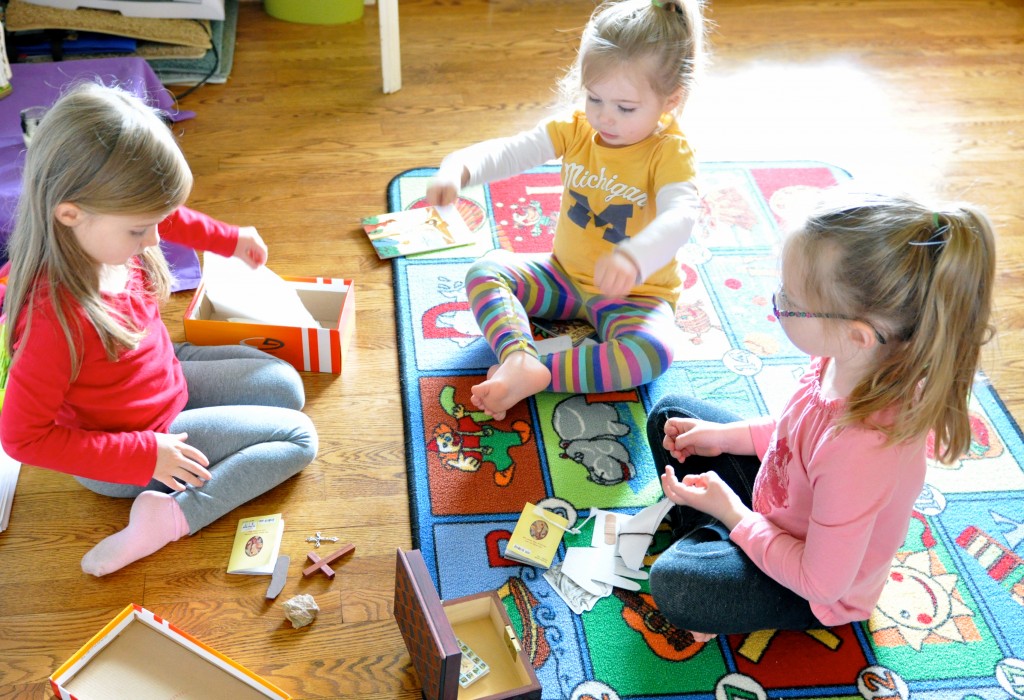
How do we do it? We use both boxes (the one I made last year and the one Miss made) and take all the items out. We distribute the items among the girls, and each of them also gets a small pocket Stations book to follow along with the pictures. We use this book to read the prayers and the descriptions of the Stations (and BTW, what a rip off, Amazon, the book was $2 at our local Catholic store!). As we read about each station, the girls with the items relating to it put the items in the boxes. Some of the prayers we all say out loud together. That’s it.

DSC_0024

Sometimes they ask questions about the Stations and we talk about what it must have been like for Jesus.

Sometimes they argue about who gets to put which item in which box. Whatever. We (or they) have read through the Stations 10 times since last Friday. (!!)

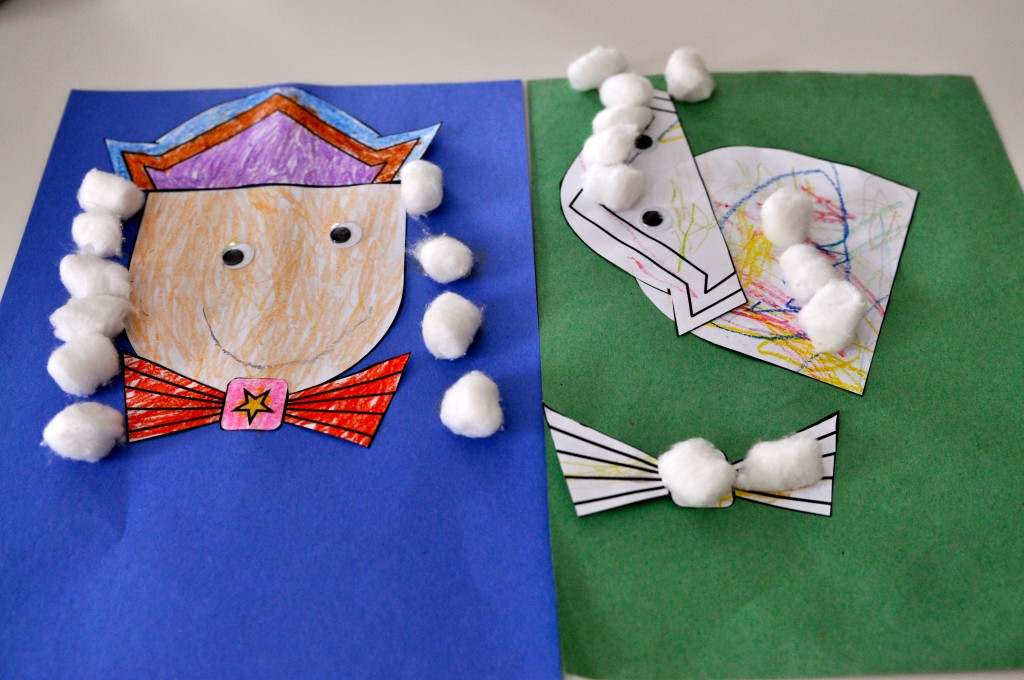
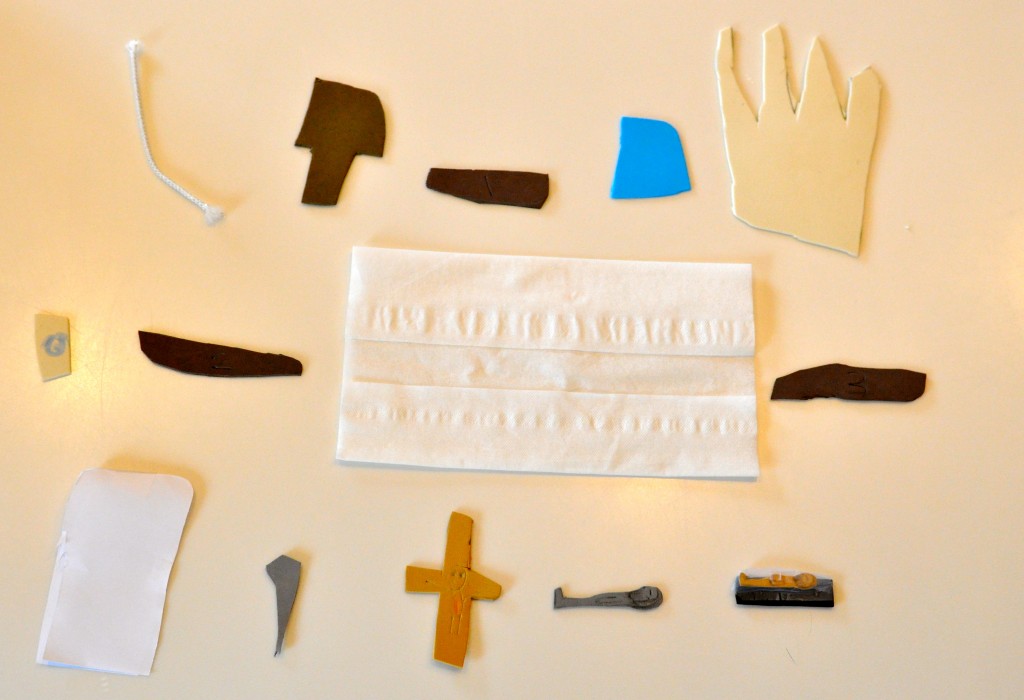
Miss used craft foam (my girls’ favorite) to make most of the items in her box. I love that she got creative with a few of the things she couldn’t duplicate from the box I made. She didn’t have a rosary, which is what I used to symbolize Mary, so she cut a piece of blue foam, knowing that blue is a color often associated with Mary. She didn’t have a rock, so she made Jesus and wrapped Him in tape to show that He was in the tomb. She could have easily gone upstairs and gotten her rosary from her room or outside and gotten a rock, but she chose to make all of the items instead (except the tissue).

The cross shapes aren’t perfect. The hand (symbolizing Simon helping Jesus) is missing a thumb. But she made it all by herself. And that has made her want to pray the Stations of the Cross and look at the items symbolizing each station every day. And because she’s the oldest, her sisters want to do it too.

DSC_0033

I had thought I might make this a how-to-type post, but then I realized I really couldn’t. In this case, the complete independence of the project, and the creativity and satisfaction that resulted from the process, made it so much better than if I had set out all the materials and had a planned way for Miss to make each item.

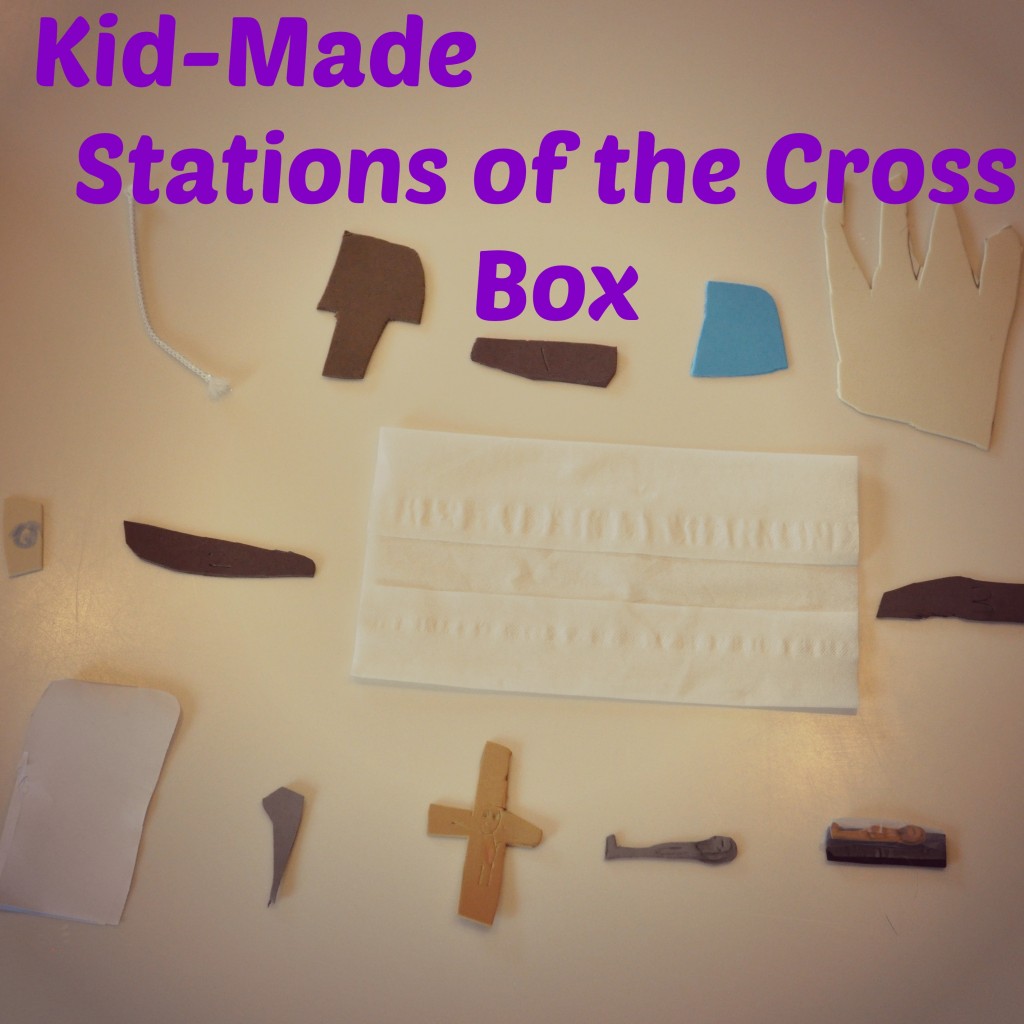
Obviously, I think it would be great to give your kids the idea to do this along with some suggestions on how to make it happen (I wish I had thought of it!), but I don’t really have those suggestions other than to show you another photo of Miss’s finished product and say, “Let them go for it”:

DSC_0037

By rows, top top bottom, left to right:

  1. Jesus is condemned to death (rope)
  2. Jesus takes up his cross
  3. Jesus falls for the first time (that’s supposed to be a BandAid, it has a 1 written on it)
  4. Jesus meets his mother
  5. Simon helps Jesus
  6. Veronica wipes the face of Jesus
  7. Jesus falls for the second time
  8. Jesus meets the women of Jerusalem (they are crying, thus a tissue)
  9. Jesus falls for the third time
  10. The soldiers tear off Jesus’s clothes (that is a piece of paper folded and taped to represent a tunic)
  11. Jesus is nailed to the cross
  12. Jesus dies on the cross
  13. Jesus is taken down from the cross (Miss said that this is the “Jesus outside the tomb”)
  14. Jesus is placed in the tomb (Jesus wrapped in tape = “Jesus inside the tomb”)

All kept together in a nice shoebox she found in her closet.

IMG_4445

If you try this with your kids, please let me know how it goes!

Sharing Dessert, Pig Slaughter, and Advent

Linking up with Conversion Diary

1. This is something I have never really thought about before, but apparently sharing a dessert at a restaurant is an intimate act. I went out for dinner with Super Friend the other night. The waitress misunderstood our dessert order and brought us two decaf coffees but only one chocolate lava cake with ice cream on the side. Only one. Super had to get home, and the lava cake takes a bit to bake, so we couldn’t just order a second one. We had to share the one we got.

Unfortunately, the waitress also didn’t bring us extra plates for splitting the cake (I guess she never thought that sharing a dessert is an intimate thing either). The two of us sat there for a few beats, spoons hovering above the single dessert, just looking at it. We are very close friends, but it was kind of an awkward moment.

Finally Super Friend echoed my own thoughts as she said, “I can’t do this,” pulled her saucer out from under her coffee cup, and scooped half of the cake and ice cream onto her own little plate. Whew! I was relieved. And I was very bummed to only have half of a dessert to eat.

2. My hubby is going to get our pig this weekend (meaning slaughter and butcher it while telling dirty jokes with his cousin and friends). We have eaten almost all of the one we got last year, minus a couple of pork chops, a few brats, and a roast or two. Is it just me, or are pork chops the worst thing in the world to try to cook? I have almost never eaten one that wasn’t like eating leather, and I can’t seem to cook one properly to save my life. This year I asked my hubby to just grind the chops up into sausage or something. I love sausage. I’d be happy if I never had to look at another pork chop again.

3. I love fall crafting. Have I mentioned this before?

DSC_0513 DSC_0519 DSC_0521 DSC_0523

4. We will be using glitter tonight. Lord help me.

5. I have recently discovered Advent. How odd that I didn’t really even know what Advent meant until the past week or two as I’ve been looking into it. I mean, last year we had an “Advent” calendar. But it was purely for the purpose of counting down the days until Christmas and doing a little something fun each day.

A couple of weeks ago Super Friend mentioned something about an Advent wreath, and I just gave her the deer-in-the-headlights look. I didn’t know what that was. Well, now I do. And I have plans this year to make a paper-plate-and-toilet-paper-roll Advent wreath with the girls (idea courtesy of Super Friend), along with doing several other Advent activities like filling the girls’ shoes to celebrate St. Nicholas’s feast day and maybe having a Jesse tree too (last year at this time I had never even heard of a “feast day” or a Jesse tree). I’m in the process of figuring out how to integrate our traditions from years past with some new fun things to actually celebrate the true meaning of Christmas. It’s going to be good.

6. I want to share our solution to Sis learning to climb out of the Pack’n’Play. I had heard of tents for cribs, and thought I might be able to find something like that, but all of those have been recalled. I was panicking, until I found this:

DSC_0563

It’s a tent bed! I had thought of getting one of these for travel a few years ago, but the old model had thin air mattress inside it, and that made me kind of nervous about suffocation. This model has a little mattress attached to the outside of the bed, so no worries.

I was afraid Sis would freak out about being put in this thing to go to bed, but I was not about to spend a week at the Farm with her climbing out of her Pack’n’Play repeatedly throughout every nap and bedtime. So, I just let her play in it with her sisters beforehand.

DSC_0565

When it came time for her to go to bed in it, she rolled right over and did it with no fuss. Mom win.

7. I think I might watch a movie tonight. I never watch movies. Any suggestions?

See more quick takes here!

60 Kids’ Activities for Fall and Winter – The List is Done!

Our Fall and Winter Fun List is done!

DSC_0460 DSC_0464

60 fun things we will be doing in the next six months:

  1. Draw faces on leaves
  2. Make an apple pie
  3. Make fall leaves spice art
  4. Go to local apple orchard
  5. Make a leaf book
  6. Play in a pile leaves
  7. “Marble” painting using an apple
  8. Drink hot cider
  9. Leaf printing
  10. Go to a pumpkin patch
  11. Leaf rubbing
  12. Make Thankful trees
  13. Hay ride
  14. Caramel apples
  15. Melted crayon leaf sun catchers
  16. Deer hunting (really just watching this year)
  17. Hand print turkeys
  18. Go trick or treating
  19. Carve pumpkins
  20. Roast pumpkin seeds and use them to make a pumpkin craft
  21. Make an autumn sparkle tree
  22. Children’s museum
  23. Girls road trip
  24. Donate food to the food pantry
  25. Build a fort (in the house)
  26. Treasure hunt
  27. Have a pajama movie night with Super Friend and her family
  28. Bake a cake
  29. Go to open swim at the YMCA
  30. Make a bucket craft to go with this book
  31. Make muffins
  32. Have a picnic in the living room
  33. Go to story time at the library
  34. Have a family slumber party
  35. Make a pinecone garland
  36. Write a letter to Santa
  37. Buy Christmas gifts for needy children
  38. Bake Christmas cookies
  39. Drive through the park to see the Christmas lights and visit the reindeer
  40. Set up nativity
  41. Have a Christmas music dance party
  42. Decorate the Christmas tree
  43. Make salt dough ornaments
  44. Visit Santa
  45. Sing Christmas carols
  46. Make hot glue and glitter snowflake ornaments
  47. Catch snowflakes
  48. Make snow angels
  49. Go Skiing
  50. Make paper snowflakes
  51. Blow ice bubbles
  52. Make a snow fort
  53. Drink hot chocolate
  54. Read books by the fire
  55. Make a snowman
  56. Have a snowball fight
  57. Snowman ice cream sundaes
  58. Make Valentine hearts with handprints (something like this, maybe even with glitter)
  59. Make kid-friendly tiramisu
  60. Make Valentine flower arrangements

Motherhood and Miscellany - 60 Fun Kids' Activities for Fall and Winter

Of course there is a lot more crafting and cooking on this list than there was on our summer list. Something about fall gets me in a super crafty mood. Leaves, apples, pumpkins, turkeys, Halloween… It’s all just so perfect making stuff. We already did marble painting with an apple (#7) and the girls loved it.

DSC_0448 DSC_0449 DSC_0451

And don’t even get me started on Christmas crafts… I’m a little giddy thinking about it.

I decided to put more projects that involve glitter or other loathesome materials on the list so I will have to do them (for example see #3, #15, #21, #46 above). I really detest glitter, but the girls LOVE working with it. We made glittery firework art this summer (only because I put it on our list and we did it outside) and it was such a treat for them. So, it’s on there. Multiple times.

It will be fun.

I will meditate prior to doing crafts that involve glitter or other finely powdered substances (Spices? Sounds awesome for crafting. And a little bit horrible).

I didn’t make separate fall and winter lists because around here it’s usually hard to tell where one season ends and the other begins. Winter weather typically starts long before the solstice. Plus, plenty of the activities could be done in either the fall or winter, so I just combined them.

If you want to use some of this stuff for separate lists, the items are organized like this:

  • Fall #1-21
  • Either Fall or Winter #22-34
  • Winter/Christmas #35-46
  • Winter/General #47-57
  • Winter/Valentine’s Day #58-60

I can’t wait to get into the activities with my girls.

DSC_0465

What fall and/or winter activities are you looking forward to?

So Um, This is the Bible…

I have started trying to incorporate some religion into our homeschool lessons.

I have to laugh a bit at myself as I think about it, because it’s been a little awkward so far.

I end up saying things like, “So while we’re talking about the letter Z, let’s learn about St. Zita! Okay, soooo she was a saint. And um, a saint is someone who’s, well uh, really holy, and, um dead. And so, you can ask a saint to pray for you. So yeah, St. Zita!” And then I read something to them from a book or our new curriculum supplement from Catholic Icing that allows me to actually sound as though I know what I’m talking about for a minute. But I pretty much don’t.

I am totally learning all of this stuff with my kids as I teach them. But I’m cool with that. I kind of like learning through teaching. I’ve been doing it all along anyway. I learned a ton of stuff about groundhogs when we did letter G, and about horses when we did letter H.

Our new curriculum helps me to add some religious teaching to what we’ve already been doing, keeping with the letter we’re working on and adding some other things.

We just did our first Catholic craft. Presenting, St Zita:

DSC_0507

I am so proud (the idea for this also came from Catholic Icing, I just used some different materials).

I’ve been having a lot of fun with this new aspect of our school. Even when I know I’m stuttering and fumbling awkwardly to describe something that I don’t fully understand myself, I’m enjoying the process. And the girls don’t seem to notice my stumbles, or care. I’ve even discussed with them how I’m learning lots of these things right along with them. Miss was very understanding. She said, “That’s okay Mama. I’m just a kid and I really have a lot to learn, so you know more than me.” At least she thinks so.

DSC_0513

The Bible is another topic I’m kind of faltering through with them. Each lesson from the curriculum has a Bible verse that goes with the letter we’re doing. So today I even took my Bible (which I just bought a week ago) into our school room and read and “discussed” a verse with them.

It went something like this:

Me: “So this is the Bible. It’s the book that, uh, tells us lots of important stuff that God wants us to know.”

Them: Blinking.

Me: “And so the Bible is full of um, well look at all these words in here (fanning pages). This is a really big book!”

Them: Leaning in to look at pages. They seemed interested!

Me: “And this, um, tells us how God wants us to act and lots of other things. And there are different books in here, see this is the book of Wisdom… Huh. There’s a book of Wisdom?  I didn’t know that. Okay so then here’s Proverbs, and here’s Psalms. Yeah. And the verse we’re reading today is from Psalms… Let’s see Psalm 97:8, ‘Zion,’ oh, what letter does that start with?”

Them: “Z!”

Me: “Yes! Okay, ‘Zion hears and is glad, and the daughters of Judah rejoice because of your judgements, O Lord.'” (In my head, “crap, what does that mean?”)

Them: Blinking. Smiling. Waiting.

Me: “Right, so um, that means that, uh, the people in Zion were happy. Uh huh. Because of what God said.”

They were content with that. Thankfully, though they actually did seem to be listening (which usually means 1000 inquiries), they didn’t ask me any questions about my oh-so-vague first Bible lesson. Thanks God.

What was learned:

For them: 1. Zita starts with Z; 2. That Bible is a big book!

For me: 1. I have a lot to learn; 2. Read Bible verse and figure out what the heck it means ahead of time.

So there you have it. The baby-steps implementation of religion into our homeschool.

DSC_0499

I’ve also been talking with the girls to try to help them understand the idea of Baptism, since theirs is coming up (one month from today!). I was botching that one too, so I got a few books to help me out and I have a few craft ideas as well. My husband and I have a class to attend tomorrow night about their Baptism, so hopefully I’ll be better equipped to discuss it with them after that.

So much to learn…


4th of July Fun

We’re having lots of 4th of July fun here. I love the 4th of July. It’s not my favorite holiday, but it’s up there. I like the patriotic songs and parades and the flag waving. I love the middle-of-summer-holiday barbecues or picnics, beach trips or family parties by the pool. And my favorite, of course is the fireworks. We are planning to take the big girls out to watch those tonight and hopefully catch some fireflies and make s’mores too.

They are already getting into the patriotic spirit.

I made these shirts with the girls yesterday:

DSC_0486

I got the idea here. I think we’ll do them every year.

I didn’t think of it until after I totally failed in getting Sis’s handprint, but I should have used her footprint instead I think…

DSC_0487

The girls were excited to wear the shirts that they made themselves.

DSC_0488

And we’ve read several patriotic and 4th of July themed books today, like:

Hooray for the 4th of July! by Rick Brown

America the Beautiful (Love this one) by Katharine Lee Bates and Chris Gall

America the Beautiful: Together We Stand by Katharine Lee Bates, Brian Collier (et al.)

Happy 4th of July Jenny Sweeney! by Leslie Kimmelman

Red, White, and BOOM! by Lee Wardlaw and

Apple Pie 4th of July by Janet S. Wong

Last night I put together a red, white, and blue-themed scavenger hunt for them to do this morning.

DSC_0496

I had several packs of small American flags from the Target dollar section, cut some craft foam into different shapes, and grabbed a few extra things from the dollar store this week (red, white, and blue batons, leis, and artificial flowers).

I was hoping that the girls would enjoy this activity, and they really did. Even more than I expected, I think.

DSC_0503 DSC_0512 DSC_0510 DSC_0515 DSC_0518 DSC_0517

Miss liked crossing off her items as we went.

DSC_0522

Everyone got into finding cool stuff.

DSC_0520

When we came in we got all decked out in our red,white, and blue stuff (picture leis, flowers in the hair, and lots of flags waving) and marched in a parade around the house, complete with Grandma singing “Yankee Doodle” at full volume.

DSC_0492

Fireworks tonight. Hope you’re having a wonderful 4th too.

Art from Nature. With Glitter.

Something that I have really wanted to do with the girls this summer is to get them outside to do a treasure hunt in our yard for natural items that they could use to do an art project. A “nature collage,” is I guess what I was thinking, though I didn’t have anything terribly specific in mind.

So a couple of days ago I rounded up their Halloween buckets so they could collect some treasures and off they went.

DSC_0490 DSC_0491 DSC_0493

They found some great stuff. Leaves, sticks, flowers, rocks, acorn tops, etc.

Today we got out the buckets and some big pieces of cardboard that I cut from a box and got to work.

I had this image in my mind of some really earthy, organic-looking artwork with all the natural materials they would be using.

But then I saw the glitter glue.

IMG_2223 IMG_2225

Seriously? Glitter and nature go perfectly together.

IMG_2232 IMG_2237

Sis found some more treasures while her sisters worked.

IMG_2239 IMG_2242 IMG_2246I love what the girls created.

Love, love, love.

Miss’s:

IMG_2243

Lass’s:

IMG_2247

This was such a fun project. Easy and cheap too!

Found objects + Cardboard + Glue (Glitter optional) + Creative Kids = Art!

I am totally hanging these on the wall. I hope the enormous rocks don’t fall off…

Summer “Bucket List” – 50 Summer Activities for Kids

I am working on creating a list of activities to do with the girls this summer. Our very own Summer “Bucket List.”

The list has been a work in progress in my brain for a few weeks now, so it’s helping me to get it written down so I won’t forget what I want to do.

And I like having a list because I’m a bit compulsive about checking things off. Speaking of which, since this has been vaguely floating in my head for a few weeks, some of the items are already done. Yay me!

Here’s our Bucket List for this summer:

  • Go Fishing – Done (though Lass still wants to catch a whale…)

DSC_0545

  • Sleep Out in a Tent
  • Hunt for Bugs – Done, but we need to do it again when it isn’t raining
  • Go to the Beach
  • Pick Wildflowers – Done.
  • Roast Marshmallows and Eat S’Mores
  • Watch Fireworks
  • Grow Caterpillars into Butterflies (Got caterpillars. They’re growing. Waiting on the butterflies.)
  • Go to the Zoo
  • Go On a Treasure Hunt Outside – Done.
  • Visit a Horse Farm and Ride a Horse – Done for the visit to a horse farm, but we didn’t get to ride the horses, so we’ll try again.

DSC_0513 DSC_0486

  • Swim in a Lake or Pond
  • Go to a Splash Pad
  • Run Through a Sprinkler
  • Put a Sprinkler Under Our Trampoline and Jump
  • Visit a Butterfly Garden
  • Play Hopscotch
  • Make Popsicles
  • Play with Water Balloons
  • Catch Tadpoles – Done.
  • Go to the “Dirty Weird Zoo” Again (and try to avoid the goat attack this time)
  • Picnic Lunch in the Yard
  • Build a Sandcastle
  • Water Play (and maybe a math lesson?)
  • Have a Dance Party in the Yard
  • Go For A Bike Ride
  • Read Books Outside
  • Do an Outdoor Scavenger Hunt
  • Make Ice Cream
  • Catch Fireflies
  • Go For a Boat Ride – Done.
  • Get Ice Cream from an Ice Cream Truck
  • Go to the Farmer’s Market
  • Make Unpoppable Bubbles
  • Go to the Park
  • Make Art/Pets from Rocks
  • Go to an Outdoor Concert
  • Visit a Farm
  • Have a Cookout and Movie Night with Friends (Super Friend and Her Family)
  • Find Outdoor Treasures and Use Them to Make an Art Project
  • Make Old-Fashioned Lemonade
  • Make Firework Glitter Art
  • Bubble Painting
  • Plant a Garden – Done.

IMG_2049

  • Make a Fairy Garden or Maybe a Home for Our Rock Pets
  • Pick Strawberries, Blueberries, and/or Raspberries
  • Complete Summer Reading Programs (our local library, Scholastic, and Half-Price Books)
  • Shop Some Yard Sales
  • Make Huge Bubbles (maybe use the unpoppable bubble recipe from above for this?)
  • Do Family Date Night at Our Local Old-Fashioned Drive In Restaurant (maybe even with a picnic in the back of my Expedition like we did a few years ago)

I’m going to make a poster with these items so that the girls and I can check them off as we complete each one. Miss says she wants to “make her own list,” so we’ll see what ends up on hers.

What’s on yours?

Ready for Easter

We have been talking about Easter all week in school.

We’ve read books about the Easter Bunny. About Easter Eggs. About where both of these traditions originated. And about Jesus and the Resurrection, of course.

It has been a good week. We’ve all learned a lot. I found lots of fun activities to do addition and counting using plastic Easter eggs and small candies (like M&Ms and Jelly Bellies), and I added in a bit of number and shape recognition to some of them.

DSC_0496 DSC_0497 DSC_0498

We used up some left-over-from-St.-Patrick’s-Day poster board to make Easter bunnies.

DSC_0503 DSC_0508 DSC_0573

I often get out textural elements for the girls to add to their crafts, like cotton balls to make the bunnies fluffy (or puffy paint made with shaving cream and glue). Miss often rejects these outright. She knows what she wants, and in this case the cotton balls were not part of her vision. Lass thought it was fun to add the cotton balls. Until it wasn’t. I love their different approaches to things.

Today we dyed eggs.

DSC_0501

DSC_0512

We talk about measuring and color mixing and all sorts of fun stuff when we do this one.

DSC_0523 DSC_0518 DSC_0525

* Note: Last year I thought it was a great idea to use whisks to dunk the eggs in the dye. I even bought a second whisk this year since one of the ones I used last year didn’t work for this purpose very well. At the last minute I decided the whisks were sort of a pain (getting the eggs in and out of them was kind of messy, it was a little bit hard to get the eggs far enough into the dye, we could only do one egg at a time for each girl, etc.) and that the girls were old enough to do just fine getting the eggs out with spoons. I was right, and am glad I skipped the whisks this year.

DSC_0526 DSC_0533 DSC_0535 DSC_0539 DSC_0551

I used more food coloring in the dye this year. We used brown eggs that I buy from a friend who has her own chickens, so I wanted to dye to be extra vibrant. I love how they turned out.

DSC_0554

We got a bit messy. Some fingers got dyed. Especially Lass’s, since she kept sticking her fingers into the cups to get her eggs out.

DSC_0559

She was so eager to get her eggs in and out of the cups. She dyed four eggs green (her favorite color) before Miss pulled one of hers out of the dye, I think.

DSC_0562

They had a lot of fun. Miss said, “I think the Easter Bunny with love these eggs.”

Speaking of the Easter Bunny, he has been here tonight. He tied yarn to the older girls’ door knobs, which will lead them to their baskets in the morning.

DSC_0567 DSC_0565

We have their baskets and eggs hidden in separate rooms so they will each have a chance to find the same number of eggs. Miss is a little bit more focused in her searching and finding, so we didn’t want Lass to miss out on eggs (and their contents) if Miss found most of them. Daddy hid Miss’s in the office.

DSC_0571 DSC_0572

We are ready for tomorrow.

I was all flustered for a few days earlier this week trying to figure out the logistics of doing Easter Bunny stuff with the girls and making it to church on time at 9. I considered doing the Easter Bunny stuff all on Saturday, hiding the eggs/baskets during nap time, or somehow running in to get it done while my husband stayed out in the car with them after church. Ultimately, I decided to take advantage of the fact that the church holds Mass at several different times during the day. We’re going at 11, so we’ll have plenty of time to get everything done and be ready to go on time tomorrow. Easy.

Happy Easter!

Presidents and Perfectionism

Since we were out of town last week, we’re talking about presidents and President’s Day in our homeschool this week. Miss is very fascinated by the stories of George Washington and Abraham Lincoln. I think she especially likes President Lincoln, because we have read a few books that mentioned how much he loved to read. I suspect she views him as sort of a kindred spirit. Plus she thinks it’s really cool that he’s on the penny.

We made George Washingtons yesterday.

DSC_0495

I love them.

I had planned to do the old standby “Lincoln’s log cabin”craft using popsicle sticks today. However, Miss specifically asked to make a President Lincoln instead of making his house. Kindred spirits, I say.

So I quickly pulled up this printable from DLTK and they started working on it. I left the room for a few mintues and came back to find that Miss had looked through one of our library books to find a picture of President Lincoln to refer to while she made her craft. “So I know what he looks like,” she said.

DSC_0496 DSC_0499

She was quite pleased with her finished presidents, though we had a bit of a rough time getting there with the Lincoln craft.

DSC_0502

See, my eldest girl is something of a perfectionist. She is very particular when creating her masterpieces. The jacket she pasted onto the Lincoln picture was a bit tricky to get lined up right. I didn’t care if she had it placed perfectly, but she sure did. And she was very upset that, when placed correctly, it covered his hands a little bit. It was quite difficult for me to keep from helping her with this. She was having a complete meltdown, but I knew she could figure it out herself, and that she would feel much more satisfaction than if I fixed it for her. I ended up giving her some suggestions about how she could get the jacket the way she wanted but keep it from covering his hands, such as cutting the ends of the sleeves. She came up with her own solution though, as she usually does. She folded the sleeves back and pasted them in place, to make cuffs. Problem solved. And she did it herself. I love that “Aha!” moment.

I also love Lass’s accomplishments (she wouldn’t pose for a picture holding up her presidents).

DSC_0504

I must admit, it takes a bit of effort on my part to sit back and let them do their craft projects on their own. I have a tendency to want to “help” them place the pieces in the right general area. I guess I’m a bit of a perfectionist myself. Lately I have been extra mindful of backing off. Of letting them shine in their own ways. I show them how the pieces are “supposed” to go together and then hand them the glue sticks and sit back. It’s actually much more fun this way. And naturally they got so much more out of the process and enjoy the end product more when they do it themselves.

They are teaching me every day.


Groundhog Day Has Never Been So Fun

Groundhog Day has been my most favorite homeschooling unit so far. Apparently I dig groundhogs (pun intended, sorry).

So do my girls.

I have discovered the magic of Pinterest and my library for really bringing the fun to the topics we are covering in our school.

At the start of January, I decided that I was going to focus on units more than letters of the week, and just pick a letter that works with our unit. I’m not set on the length of time we stay on one unit. Most of January, other than the past week, was a Winter unit, with our letter being W.

This past week was a Groundhog Day unit focusing on the letter G.

My strategy for preparing for the units is to find good books on our topic and request them from our library. Then I comb Pinterest to find printables for all sorts of activities, some focused on our letter, some arts and crafts, some hopefully pulled from one or two of the books we’re reading. Then I wing it from there.

DSC_0371

I found some really fun books for our groundhog unit.

Reading Substitute Groundhog

These are the ones I used.

DSC_0377

“Time to Sleep” was actually one I had for our Winter unit, but it talks about hibernating and has a woodchuck in it, so I included it this week too. It was fun for them to realize that the woodchuck in this story is the same as a groundhog.

The first book we read was “Groundhog Weather School,” in which the Weather Groundhog puts out a classified ad looking for more groundhogs to help him predict the weather around the country. He gives six criteria, with discussions of each of them, for candidates to consider before applying:

Our white board with the week's rhyme and groundhog characteristics

Various animals, such a a hippo, a monkey, and a skunk, check off the criteria they do meet, but then ultimately realize they don’t meet all of the qualifications. The girls really enjoyed going through each of the qualifications, repeatedly, for each of the animals, and disqualifying them at various points in the list. I left the list up all week and we discussed it many times while reading other books too.

I got lots of the stuff we used from DLTK Crafts for Kids, including the rhyme in the picture above, which is a song to the tune of “I’m a Little Teapot.” I made up some hand motions for it and we sang it a few times each day after doing our calendar. The girls loved it.

Another thing we did every day along with our calendar and weather discussion was to judge whether we thought the groundhog would see his shadow if he were to pop up that day. Miss really got into this and did a great job thinking it through and making a prediction each day.

The DLTK site has tons of free printables for activities, games, and crafts. Another one we used from them was the Five Little Groundhogs felt board activity.

Groundhog Day Felt Board activity

And of course we had to make their toilet paper roll groundhogs.

Coloring toilet paper groundhogs Coloring toilet paper roll groundhog Gluing groundhog parts onto toilet paper roll

The girls just made these today, and both of them are sleeping with their finished groundhogs tonight. Miss even insisted that we make burrows for the groundhogs, so we glued pieces of construction paper into cylinders that the groundhogs could fit into and “pop up” as desired.

DSC_0364

We did lots of the printables from the DLTK Groundhog Day section, like some of these, and these.

2 Teaching Mommies has awesome units that you can download for free and I used several of their Groundhog Day activities, like these:

DSC_0362
Groundhog body parts

I laminated the pages and added velcro so the pieces would stay put for my girls (and not get lost). I especially love watching Lass do activities like these, because she really shows how much she knows when she can do it in a fun and different way (if I just ask her questions, she often pretends she doesn’t know).

I added a few other fun things to round out our groundhog fun. We went into my bedroom where we could pull the blackout shades and have a large expanse of blank wall to do some shadow playing. We built a burrow with pillows and the girls took turns “popping up” and seeing their shadows. We experimented with moving closer and farther from the light source to see what happened to the shadows. And of course we practiced making some good old shadow puppets.

This morning the girls made their hypotheses about whether the groundhog would have seen his shadow. Then we checked out the website of The Punxatawney Groundhog Club to see what Punxatawney Phil saw (or didn’t see). We watched the webcast, which I thought would be really exciting. I wish I would have watched it first so that I could have automatically fast forwarded the first two thirds of it which was nothing but a looong procession of all the “Groundhog Officials” and introductions of all of them. There must have been 15-20 of them. The girls did get a kick out of it once they finally pulled Phil from his “burrow,” but even that was sort of lame. I’ll just be thankful that I didn’t wake them up at 6:25 to watch it live… Not that I would have done that.

Their favorite thing this morning was when I played this recording of the whistling sound a groundhog makes when it senses danger. We have been talking about how some people call groundhogs “Whistle Pigs” because of this. They really got a kick out of hearing how it sounds.

We had lots of discussions about what makes an animal a mammal, what hibernating is, what herbivores eat, what animals are predators of groundhogs, and how groundhogs set up their burrows. It was all quite fascinating, really.

And finally, it wouldn’t have been Groundhog Day without a groundhoggy snack.

Chocolate pudding cups, graham cracker crumb “dirt” (the other versions I’ve seen of this snack used either chocolate graham cracker crumbs or oreo crumbs, but this is what was in my cupboard, so we had lighter dirt), Milano Cookies, slivered almonds broken in half for the ears, and fudge applied with a toothpick to stick on the ears and make the face. Not quite as elaborate as some, but enough to impress my kids.

Groundhog Snack Enjoying her Groundhog Snack

So that’s it. I kind of can’t believe how much fun groundhogs can be. I think I enjoyed them as much as my girls did.

Next we’ll do two weeks of V is for Valentine. We’ll also throw some President’s Day stuff in there before we go out of town in a couple of weeks.

Happy Groundhog Day!